Alternative Barcodes (Barcode, Datamatrix, QR Code)
Learn about Shelf's alternative barcode feature that extends beyond standard QR codes, enabling organizations to integrate multiple barcode formats into their asset tracking systems.
Shelf's alternative barcode feature extends beyond the standard QR codes automatically generated for assets and kits. This paid add-on enables organizations to integrate multiple barcode formats into their asset tracking systems.
Supported Barcode Types
The feature supports five barcode types:
- Code 128: 4-40 characters including letters, numbers, and symbols
- Code 39: 4-43 alphanumeric characters (A-Z, 0-9)
- Data Matrix: 4-100 characters, printable at extremely small sizes
- External QR: 1-2048 characters, any text or URL — for QR codes generated outside Shelf that you want to attach to a Shelf asset (case is preserved on save)
- EAN-13: 13-digit numeric codes matching retail product standards (Shelf validates the check digit on import)
How to Generate Code 128 Barcodes
To generate a Code 128 barcode for an asset:
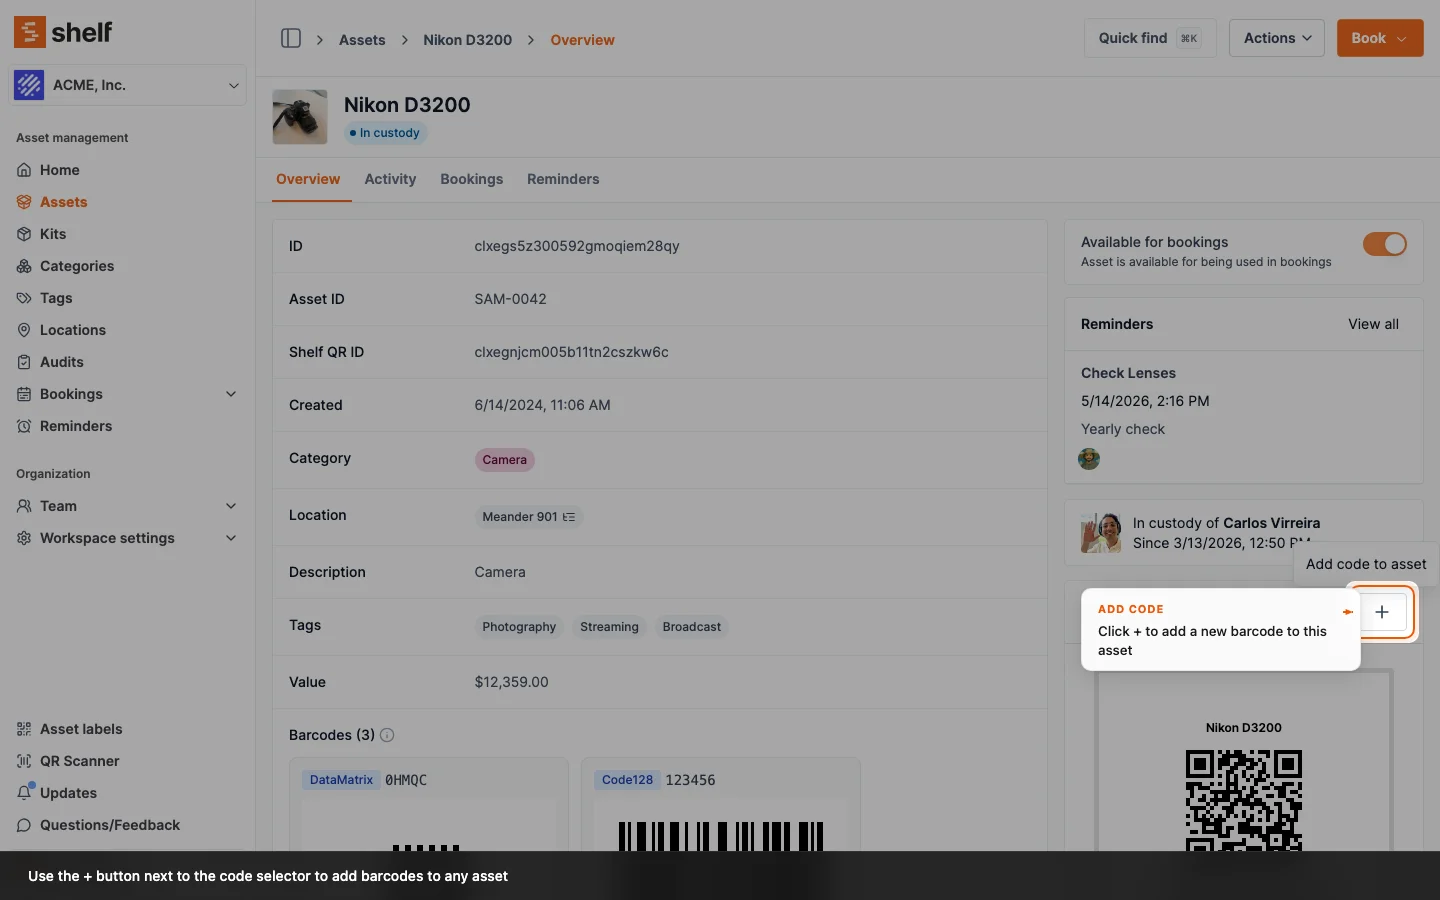
- Open any asset in your workspace
- In the right sidebar, find the code selector dropdown and the + button next to it
- Click the + button to open the "Add barcode to asset" dialog
- Barcode Type defaults to Code 128 — change it if you need a different format
- Enter your barcode value (4-40 characters — letters, numbers, and symbols like
ABC-123) - Click Add Barcode
The barcode is generated and saved immediately. It appears in the Barcodes section of the asset page and can be scanned with any barcode scanner.

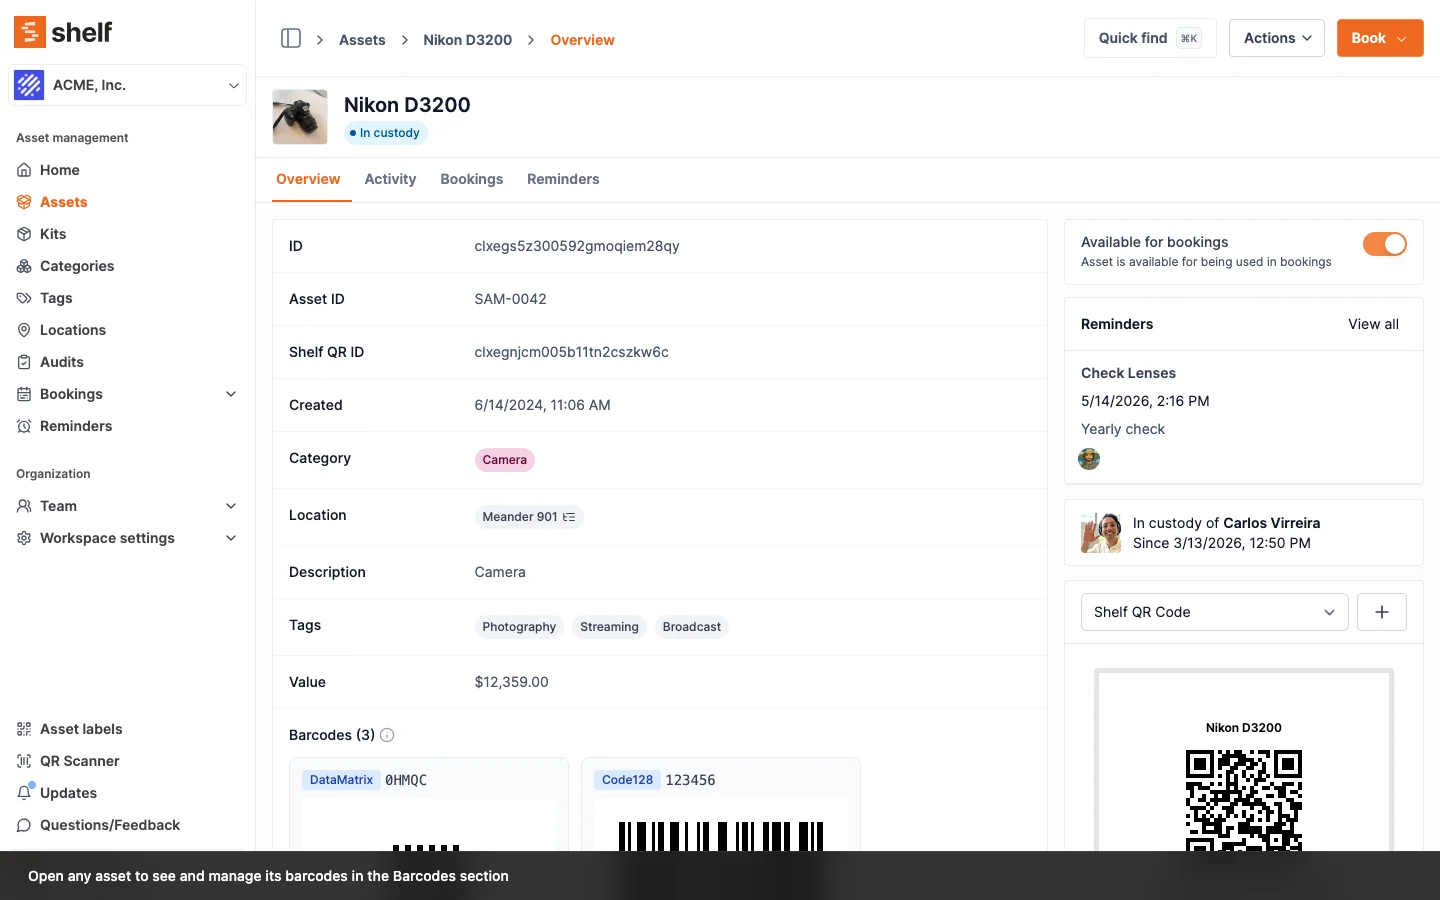
You can also add barcodes by scanning existing physical barcodes using a device camera. The system automatically detects the barcode type and value during scanning.
Barcodes on Your Assets
Once added, barcodes appear in the Barcodes section at the bottom of each asset page. You can attach multiple barcodes of different types to a single asset — there is no limit.
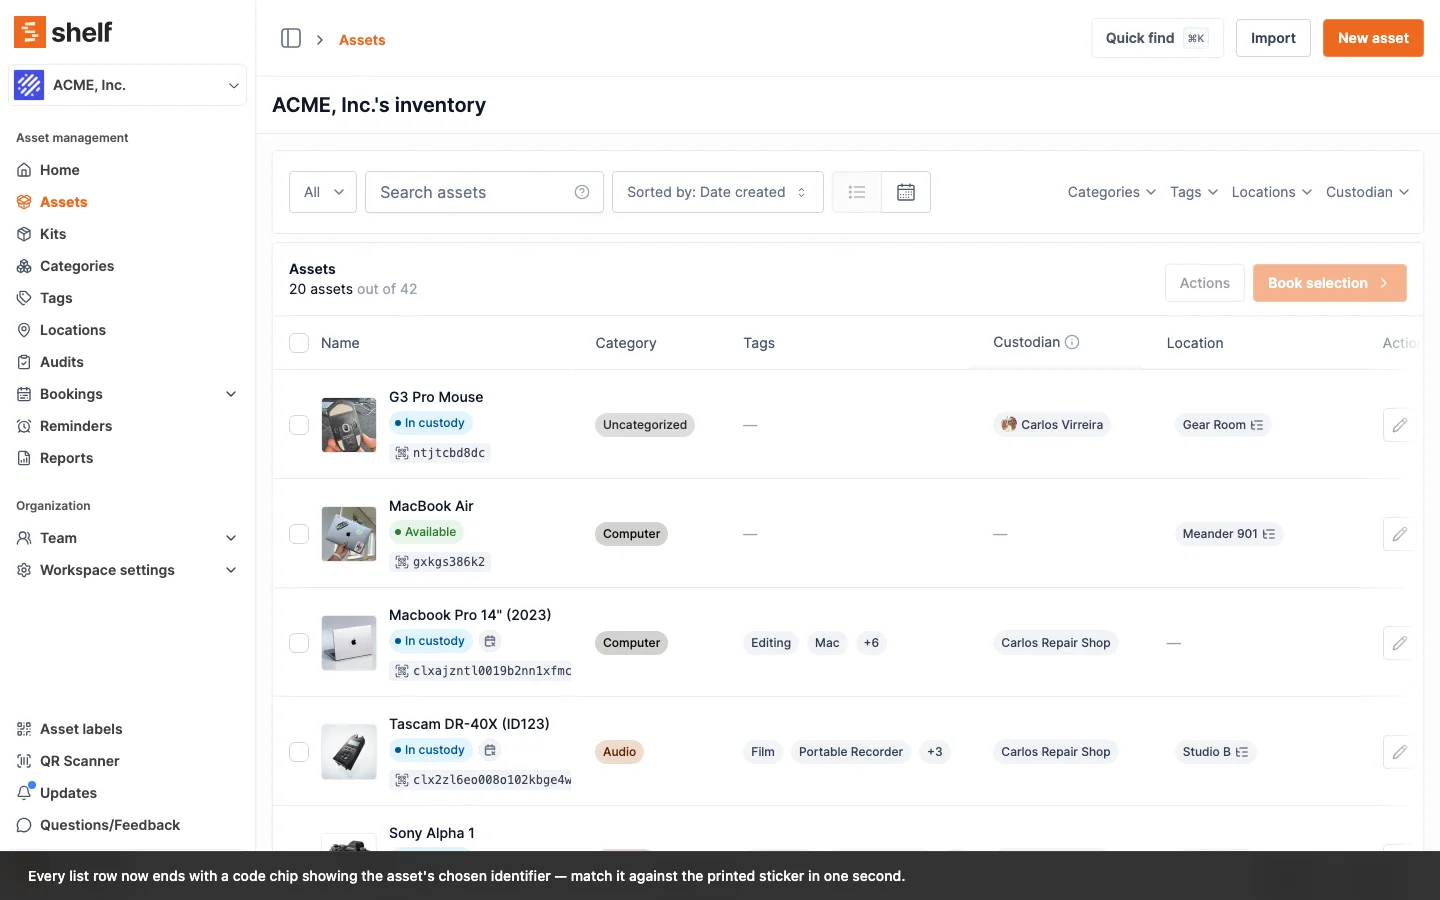
Showing a Barcode on Every List Row
Once an asset has a barcode, Shelf can display that barcode next to the asset's name on every list view — /assets, /kits, the kit-detail asset list, the booking detail page, the "add assets/kits to booking" modals, the locations page, and the audit overview. A pack-out picker can read the chip on screen and match it to the sticker on the gear.
To pick which code shows up:
- Go to Settings → General
- Find Preferred display code
- Choose one of the barcode-type options (Code 128, Code 39, DataMatrix, External QR, or EAN-13)
- Click Save changes
Every asset that has a barcode of the chosen type will now show its value as a small gray chip next to the row. Assets without a barcode of that type fall back to their QR Code ID, rendered with a quieter outlined style so the missing data stays visible.
Tooltip vocabulary — what the chip tells you
Hover any chip and you get a structured tooltip with a bold title (Code 128: ABC-123) and a body that explains what's going on in plain English:
- Matches your workspace's preferred display code. Change in workspace settings. — the default state.
- Per-asset override — overrides workspace's preferred Code 128. — you've set an override on this specific asset.
- Your workspace prefers Code 128 but this item has no Code 128. Add one (or change the workspace setting) to fix. — the asset has no barcode of the preferred type, so the chip falls back to the QR Code ID (rendered with an outlined ring instead of a filled background).
The same text is mirrored to the chip's aria-label for screen readers.
Per-asset override
If most of your fleet uses one identifier (say, Code 128) but a small subset needs to display a different code, you can override the workspace preference on a single asset. Open the asset's edit page (Owner / Admin), scroll to "Preferred display code for this asset", and pick a specific barcode from the radio group. That asset's chip will show your override on every list view, and the chip tooltip will read as an override.
The Workspace default row in the radio group also tells you what it will resolve to right now — including a fallback warning if your workspace prefers a barcode type the asset doesn't have. See Asset Identifiers — Per-asset override for the full breakdown, screenshots, and the verbatim copy.
Finding an asset by its barcode value
On the booking detail page (when filtering the assets attached to a booking) and on the audit asset picker, you can now type a barcode value into the search box and the matching asset will appear. Useful when you have a sticker in hand and want to jump to the row that represents it. Both surfaces are backed by GIN trigram indexes on Barcode.value and Qr.id, so the substring search stays fast even on large workspaces.
Activity log
Workspace-preference changes emit ORGANIZATION_QR_ID_DISPLAY_PREFERENCE_CHANGED and per-asset override changes emit ASSET_PREFERRED_BARCODE_CHANGED. Both show up in the standard activity feed.
Migrating Barcodes from Another System
If you are migrating from another asset manager and want to keep your existing barcodes:
- Export your barcodes from your current system as a CSV
- Import via CSV — Shelf's CSV import supports adding barcodes in bulk, enabling you to bring hundreds of barcodes simultaneously
- Each barcode must be unique across your workspace — duplicates will be flagged during import
This makes it straightforward to switch from tools that use Code 128 or other barcode formats without losing your existing identifiers.
Primary Use Cases
Organizations implement alternative barcodes to:
- Maintain existing barcode systems while adopting Shelf
- Facilitate departmental preferences for different code formats
- Preserve manufacturer identification codes
- Support space-constrained labeling scenarios (Data Matrix is ideal for small labels)
Operational Features
- Multiple barcodes can attach to single assets with no quantity limits
- All barcode types function identically within Shelf's scanning, booking, and check-in systems
- CSV bulk import enables adding hundreds of barcodes simultaneously
- Each barcode must maintain uniqueness across the workspace
Enabling the Barcodes Add-on
The Barcodes add-on is self-service — workspace owners can activate it directly without contacting sales.
Free trial
Workspace owners can start a 7-day free trial of the Barcodes add-on at no cost. To start your trial:
- Open any asset in your workspace
- In the Barcodes section of the asset form, click Start free trial
- Review the features and confirm — barcodes will be enabled immediately for your entire workspace
Each workspace can use the free trial once. After the trial period ends, a paid subscription is required to continue using barcodes.
Subscribe directly
If your workspace has already used the free trial, or you are ready to subscribe:
- Open any asset in your workspace
- In the Barcodes section, click to open the unlock dialog
- Choose a monthly or yearly subscription and complete checkout via Stripe
Note: Only workspace Owners can start a trial or subscribe. Administrators and other team members will see a prompt to ask their workspace owner to enable the add-on.
Ready to try Shelf?
Put what you're learning into practice. Free plan available — no credit card required.