

Using External Barcode Scanners with Shelf
Shelf supports handheld and wireless barcode scanners on the desktop interface, allowing you to scan QR asset tags using barcode scanning equipment for rapid processing of multiple items.
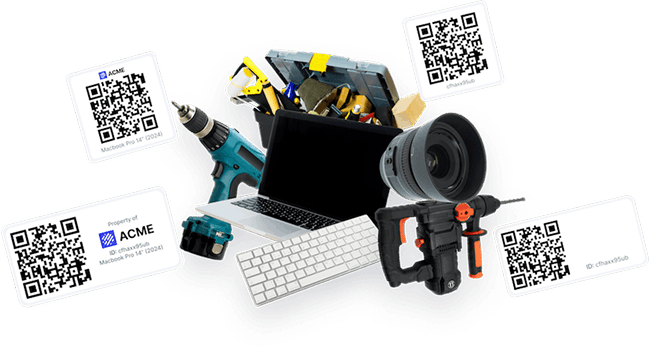
Compatible Hardware
To use this feature, you will need:
- A handheld or wireless barcode scanner with QR code support
- The scanner must be properly connected to your computer (via USB or Bluetooth)
- The scanner should be configured to send an Enter/Return after scanning (most scanners do this by default)
Scanner Modes
Shelf's scanner interface offers two modes:

- Camera mode: Uses your computer's webcam to scan QR codes
- Barcode scanner mode: Uses a connected handheld or wireless barcode scanner
You can toggle between these modes using the dropdown in the top-right corner of the scanner interface. This article focuses specifically on using the Barcode scanner mode.
What the Scan Field Accepts
The text field in Barcode scanner mode is not limited to Shelf's own QR codes. Whatever your scanner sends into it, or whatever you type by hand, is matched in this order:
- A SAM ID — the workspace's sequential asset number, such as
SAM-0042. Anything shaped like one (letters, a hyphen, and four or more digits) is treated as a SAM ID first. - A Shelf QR code — either the full URL printed in the label's code, or the bare QR ID underneath it.
- A barcode value — any Code 128, Code 39, DataMatrix, External QR or EAN-13 value registered on an asset or a kit in your workspace. This needs the alternative-barcodes add-on.
When your barcode value looks like a SAM ID
Plenty of teams label their gear with codes such as LAPTOP-0001 or TOOL-4712 — letters, a hyphen, and four or more digits. That is the same shape a SAM ID has, so a scan of one of those labels is treated as a SAM ID first.
Shelf now checks both. If no asset in your workspace carries that sequential ID, the scan falls through to your workspace's own barcodes, and a label registered as a Code 128 (or any other supported type) on an asset or a kit resolves normally instead of stopping at SAM ID not found.
Two details worth knowing:
- The SAM ID always wins. If an asset really does carry
TOOL-4712as its SAM ID and a different asset carries it as a barcode value, the scan opens the asset whose SAM ID it is. - The fallback needs the add-on. Without the alternative-barcodes add-on there are no barcode values to fall back to, and a SAM-shaped code that matches no asset still reports SAM ID not found.
This applies to the desktop scanner in Barcode scanner mode, to typed entry, and to the Enter code field in Shelf Companion. It is a server-side change, so the phone picks it up with no app update to install.
Using a Barcode Scanner with Shelf
To scan assets with your barcode scanner:

- Ensure the scanner interface is in "Barcode scanner" mode
- Important: Click inside the text field to ensure it is focused
- Use your handheld or wireless barcode scanner to scan the QR code on your asset
- The system will automatically process the scanned code and redirect you to the relevant asset page
Scan to Add Feature in Bookings
One of the most powerful applications of the barcode scanner is in the Bookings module. The "Scan to Add" feature allows you to quickly add multiple assets to a booking by scanning their QR codes.


Accessing Scan to Add
- Navigate to the Bookings area in Shelf
- Open an existing booking or create a new one
- Click the Scan button in the Assets section
Using Scan to Add
The Scan to Add interface allows you to scan multiple assets in succession:
- Click in the text field to focus it
- Scan each asset's QR code with your barcode scanner
- Each scanned asset will appear in the list below the input field
- Once you have scanned all desired assets, click Confirm to add them to your booking
Shelf will also show any potential conflicts directly from the scan to add interface, and it refuses the ones that would double-commit something. An individually tracked asset that is already reserved or checked out over your booking's dates is turned away. A quantity-tracked asset is turned away when the units the booking would then hold are more than the pool can supply on those dates, so a fast run of scans cannot push a pool past what you own. Scanning is held to exactly the same rule as adding items through Manage assets.
Tips for Optimal Barcode Scanner Performance
- Always ensure the text field is focused before scanning
- Test your scanner on a few QR codes before performing large batch operations
- If using a wireless scanner, check battery levels before beginning extensive scanning sessions
- For optimal efficiency, consider scanners with memory mode if you need to process many assets across multiple locations
- Make sure your scanner is properly configured to handle QR codes (some scanners may need specific configuration)
Troubleshooting
If you are experiencing issues with your barcode scanner:
- Scanner not registering: Ensure the text field on the Shelf interface is focused (clicked)
- Scanner reads but nothing appears: Check if your scanner is correctly configured to send data to the active input field
- Partial code reading: Verify that your scanner is properly configured for QR codes, not just linear barcodes
- Batch scanning issues: Confirm you are using the "Scan to Add" feature in the Bookings area, as this is the only place that supports batch processing
For additional support with your specific barcode scanner model, contact support at support@shelf.nu.
Related Articles
Ready to try Shelf?
Put what you're learning into practice. Free plan available — no credit card required.