

Getting Started with Shelf Companion for iPhone
Download, sign in, and start scanning with the free Shelf Companion app on iPhone and Android. Covers QR scanning, kits, audits, custody, bookings, the booking calendar, and multi-workspace switching.
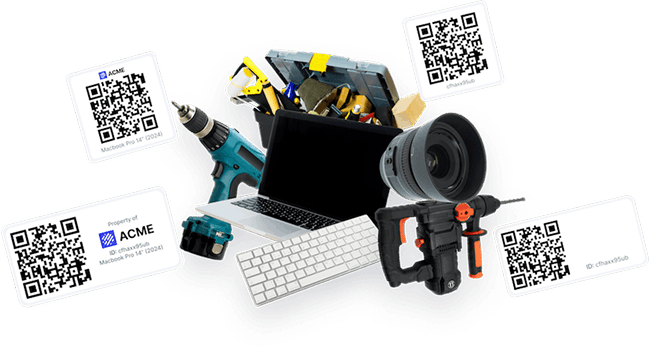
Shelf Companion is the free app for your Shelf workspace, on iPhone and on Android. It puts the field-side workflows of Shelf — scanning, kits, audits, custody, bookings — directly on the phone. The web platform stays your source of truth for workspace setup, configuration, billing, reporting, and admin work.
This guide walks through downloading the app, signing in, and using each of the core flows.
What You Need First
Before installing Shelf Companion:
- An existing Shelf account. The app does not create a separate account or workspace — it connects to your current Shelf workspace using the same login. If you do not have one yet, sign up free at app.shelf.nu/join.
- An iPhone running iOS 15.1 or later, or an Android phone. Both stores carry the same release, built from the same code, so the version number in the app matches on either platform. The current release is 1.5.0.
- Optional: assets in your workspace already labelled with Shelf QR codes (or registered Code 128, Code 39, EAN-13, DataMatrix, or external QR codes). If you do not have labels yet, you can still browse and act on assets manually — see Printing QR labels.
The app is free with any Shelf plan, including the free Personal tier. Nothing is sold through the app. If your workspace does not have an add-on enabled (for example, the Audits add-on), the app shows an informational message rather than a paywall.
1. Download the App
Search the App Store or Google Play for "Shelf Companion", or open the direct link for your phone:
- Download Shelf Companion on the App Store (iPhone)
- Download Shelf Companion on Google Play (Android)
The app is published by Shelf Asset Management, Inc., in the Productivity / Business category, age rating 4+. Global store propagation can take up to about a day after a release — the direct links work immediately.
2. Sign In
Open the app and tap Sign in. Use the same email and password you use at app.shelf.nu — same workspace, same data, same permissions.
If your team uses SSO, tap Sign in and the app opens your organization's SSO flow in a secure in-app browser — the same login screen you use on the web. Your identity provider handles the password, one-time code, and any multi-factor step, then returns you to the app signed in. This works on both iPhone and Android. If you have not configured SSO yet, see User roles and their permissions and the SSO setup guide.
After sign-in, your session is held in the phone's own secure storage — the iOS Keychain on iPhone, the Android Keystore on Android. Signing out clears the token.
3. Switch Workspaces (if you have more than one)
If you belong to multiple Shelf workspaces, tap Settings in the app and choose the workspace you want to act in. You can switch at any time. The app respects each workspace's role-based access — base user, self-service member, admin, owner — so you only see and do what you are entitled to do.
Where a fresh sign-in lands. The app opens the workspace you last chose in Shelf, the same one the web opens for you. If you have never chosen one, you land in your personal workspace. SSO users are never shown a personal workspace on any platform, so they land in a team workspace their administrator assigned. This is decided on the server, so it applies to the app you already have — there is nothing to update.
4. Scan a QR Code or Barcode
Tap the Scan action from the home tab. Point the phone camera at a Shelf QR label or any registered barcode (Code 128, Code 39, EAN-13, DataMatrix, external QR).
- If the code is linked to an asset in your workspace, the app jumps straight to the asset detail screen.
- If the code already belongs to your workspace but is not linked to an asset yet (a sticker you claimed earlier, or a code whose asset was deleted), the app offers Create Asset. Tap it and the asset creation screen opens with that code attached, so the asset you save is linked to the physical label straight away. You need asset-creation permission in the workspace to see the button.
- If the code has not been claimed by any workspace yet (a fresh sticker off a new label sheet), what happens depends on your role. Admins and owners claim it without leaving the app: the app offers Create New Asset and Link Existing Asset, and either one claims the code into the workspace you are currently in before continuing. Base and self-service members cannot claim codes at all, in the app or on the web, so they get Link in Browser and an administrator has to claim the sticker before it can be used. Codes that belong to a kit open in the browser for everyone.
Where a scan happened. From version 1.3.0 the app can record the phone's location on a scan, so an asset's record shows where it was last seen. The app asks for location permission once, the first time you open the scanner. It is entirely optional: decline and scanning works exactly as before, just without coordinates. The app only uses location while you have it open, never in the background, and a scan is never delayed waiting for a fix. This brings the app in line with the web scanner, which has always recorded the browser's location. You can change your mind at any time in your phone's settings.
Which phone made the scan. Since the update of 2 October 2026 the app tells Shelf which device and app version a scan came from. The scan panel on the web asset page now reads, for example, Apple - iPhone under Device, Shelf app 1.5.0 under Browser and iOS under OS, where it used to say Unknown device. An Android phone shows its brand and model. The app sends only the device type, the system version and the app version. Scans from an app that has not taken the update still read Unknown device.
If you switch workspaces while an unclaimed code is waiting to be linked, the app stops rather than claiming the sticker into the wrong place: it tells you "The scanned QR code belongs to the workspace you started in. Scan it again from this workspace to link it here." and takes you back.
The camera pauses itself, and any tap wakes it. After about thirty seconds without a scan the camera stops and the screen reads Camera Paused — Tap anywhere to resume scanning. Tapping anywhere that is not a control brings it back. It used to take a tap on the small play button, because the strips across the top and bottom of the view swallowed everything else.
Can't scan a label? Tap Enter code to type a QR ID, barcode value, or sequential ID (a SAM, such as SAM-0001) by hand. The field opens in the strip at the top of the camera view with the keyboard already up, so one tap is enough to start typing — it used to sit at the bottom, where the keyboard covered it. When a drawer is open, the closed Enter code pill moves to the top strip as well, so it stays reachable. This is handy when a label is damaged, hard to reach, or printed on packaging the camera can't focus on. Typed SAM IDs resolve to their asset on both the general and audit scanners; the lookup itself needs no add-on (running a full audit still requires the Audits add-on). A barcode value shaped like a SAM ID — LAPTOP-0001, say — resolves too: the app checks your sequential IDs first and then your workspace's barcodes, so a label printed in that shape no longer ends in Lookup Failed. That second step is part of the alternative-barcodes add-on; without it, a SAM-shaped code that matches no asset still fails. It all runs on the server, so the app you already have picks it up with nothing to install.
Scanning several items for one action. When you scan a run of assets for a bulk action (assign or release custody, or update location), the app gathers them into a list. If any scanned item can't take that action, the app shows a per-item blocker card you clear with one tap, and keeps the submit button disabled until every item is eligible. This mirrors the web scanner, so you never push a batch that would half-fail.
Quantity-tracked assets in a custody scan. Since the update of 2 October 2026, Assign custody and Release custody take quantity-tracked assets too. Each one gets a unit count on its row, for example 3 / 10 pcs. Tap it to change the number. Assign starts at 1 unit and stops at the units that are free. Release starts at every unit held. A release scan does not ask whose units to take back, so it works while one person holds units of that asset. If several people do, the row tells you to release it from the asset page, where each holder is listed. Units held through a kit go back by scanning the kit. Individually tracked assets, quantity rows and kits go out together with one tap. Before this update the app refused a scan made only of quantity-tracked assets, and skipped them in a mixed one. See Batch Scanning Actions.
5. Find an Asset Without Scanning
The Search assets box on the Assets tab matches the same fields the search on the web does: name, SAM ID, description, category, location, tags, the current custodian's name, QR ID, barcode value, and any custom field value. Separate several terms with commas and the list returns anything matching any of them.
If searching your phone by tag or by a word from the description used to come back empty while the same search worked on the web, that gap is closed. The search runs on the server, so the app you already have picks it up with no update to install.
Each result also prints the asset's SAM ID under its name, so when you search by a SAM you can see which record matched rather than guessing from the title.
6. View Asset Detail
The asset detail screen shows the asset image, current status, category, location, who currently has custody, and recent activity history. It also names the asset's Asset Model and its Asset ID — the workspace's own sequential label, such as SAM-0017. That is the same value the scanner's Enter code field accepts, so the phone can now tell you an asset's SAM instead of only taking one. From here you can:
- Update the asset's location — useful when you move an asset between rooms, buildings, vehicles, or job sites. For a quantity-tracked asset this action is called Placements instead, because a pool can sit in several places at once (see below).
- Assign or release custody — hand the asset to a teammate, or release custody when it comes back.
- Open the asset's full activity history — a permanent, timestamped record of every check-out, return, and transfer.
Workspace permissions apply: what you can edit depends on your role.
The code your workspace labels things with. The screen carries a Codes card that leads with the identifier your workspace chose in its code display preference — the Shelf QR, the SAM ID, or one of the asset's registered barcodes — rather than always leading with the QR. An asset that overrides the workspace choice for itself wins over it. When there is more than one code on the asset, the card's selector lets you switch between them, exactly as the web preview's dropdown does. If the preferred code cannot be shown because the asset does not carry one, the card says so in the server's own words, for example "Your workspace prefers Code 128 but this item has no Code 128." Asset list rows print the same resolved code under the name, so a row can be matched against a physical label without opening it. Kit screens follow the same rule. Registered barcodes need the barcodes add-on; without it the card holds the Shelf QR alone.
Who is holding it, and through what. When an individually tracked asset is out on a booking, the detail screen names the holder on an In Custody Of row, the booking on a Via Booking row, and when it left on a Since row — the phone's form of the web asset page's custody card. Tap the booking row to open it, when your role may open that booking; when it may not, the row still names the booking but does not tap through. Quantity-tracked assets do not get these rows, because a pool can be in several hands at once. Who sees them follows the workspace's custody visibility rules, including the exception that lets a booking's own custodian see it.
Where a pooled asset's units are. A quantity-tracked asset's detail screen lists every location that holds some of it: the first row under Locations, then one Also at row per extra location, each with its count, for example Equipment Storage · 4 pcs. Units a kit holds are named on their row as via kit and the kit's name. Units that are not at any location show on an Unplaced row.
Tap Placements (or the first location row) to open Manage Placements, the same editor the web asset page uses:
- Add location adds a row, and the bin icon on a row removes it.
- Each row has a stepper for how many units sit there, capped at the asset's total.
- A meter across the top shows Placed, Via kits and Unplaced as you change the numbers.
- Tap Save placements. The asset's activity records each location that changed.
A kit's units appear in the editor but cannot be changed there. To move them, move the kit. If the placements add up to more than the asset owns, usually because stock was used up after every unit had been placed, the meter shows Over-placed and Save placements stays off until the numbers fit. Individually tracked assets keep the single location picker.
7. Browse and Act on Kits
Kits group assets that travel together (a camera body with its lenses, batteries, and charger, for example). The app gives kits their own screens alongside assets:
- On the Assets tab, use the Assets | Kits switcher to list your kits. Each row shows the kit's category and location, and you can filter to My custody.
- Tap a kit to open its detail screen: hero image (tap to zoom), the kit's QR card, and full details (category, location, value, and who currently has custody).
- From kit detail you can Assign or Release custody of the whole kit and Move location, the same inline actions you use on an asset.
- Scanning a kit's QR jumps straight to its detail screen, and you can scan kits into a batch action just like assets. From an asset that belongs to a kit, tap through to open the kit.
- On the Assets list, an asset that belongs to a kit names the kit under its location. A quantity-tracked asset can sit in several kits at once, so its row names one kit and adds a +N for the others.
Workspace permissions apply here too: the actions you see match your role.
8. Run a Live Audit From the Floor
If your workspace has the Audits add-on enabled, you can run an audit from the app. Admins and owners can open any audit in the workspace; self-service and base users see the ones they have been assigned to. Either way it works the same:
- Open the audit from the audits list.
- Walk to the location and start scanning assets.
- Watch the progress read-out at the top update in real time as you scan: "12 of 20 found" with a percentage and a bar, and beneath it the breakdown — how many are still not scanned, and how many turned up unexpected. One glance rather than four boxes to add up.
- When the audit is complete, tap Complete audit. The audit creator receives a summary email.
"Not scanned", not "missing". An expected asset nobody has reached yet reads Not scanned for as long as the audit is open, and only becomes Missing once you complete the audit. The app uses exactly the same words, filters, and colours as the web for this, so a count you start in the morning never reads as though half the inventory has vanished. The filter pills follow the same rule: Not scanned is offered while the audit is open, Missing once it is finished.
Audits nobody was assigned to. An audit with no specific assignee shows Unassigned · admins and owners can scan, so it is clear who is expected to pick it up rather than leaving the row looking unowned.
Add evidence as you scan. Each scanned row carries an explicit Add photo/note action — tap it (or the row) to open the evidence sheet, write a condition note, and attach a photo taken with the camera on the spot or picked from the photo library. Once a row holds evidence the action becomes a count of what it carries. The first time a scanned row appears, a one-time hint points the action out: "Tap a scanned item to add a photo or condition note." Notes and photos land on the same audit record the web app writes to.
Read the evidence back. On the audit's asset list, any row that carries evidence says what it holds — "1 note, 2 photos" — and tapping it opens the full record: every note and every photo, each with who recorded it and when. Notes and photos are counted separately on purpose, so one note plus one photo never collapses into an ambiguous "2".
If your workspace does not have the Audits add-on enabled, the app shows an informational "Contact your admin" message rather than a paywall or upgrade link.
9. Bookings: Create, Build, Check Out and Check In
For workspaces using Bookings, the app now handles a booking end to end — from creating it to checking it back in.
Find the right booking. The bookings list has individual Reserved, Ongoing, and Overdue status filters, keyword search, and a sort menu (by start date, due date, name, or recently created). Each row shows a live countdown, such as "Starts in 2d", "Due in 5h", or "Overdue by 3d", so what needs attention stands out at a glance.
Draft bookings are visible only to the person who created them, exactly as on the web, so an unfinished draft never shows up in a colleague's list.
Which bookings the list shows follows your workspace, not just your role. A workspace can let Base and Self-service members see bookings they are not the custodian of, with the Bookings visibility toggle in Settings ▸ Workspace ▸ Permissions. The app reads that setting on all four of its booking surfaces: the Bookings list, the calendar, a booking's detail screen, and the booking sections on Home. With the toggle off, those members see their own bookings; with it on, they see the workspace's, minus other people's drafts.
Until recently the app ignored the setting and decided from the role alone, so a Base member in a workspace that had switched it on saw every booking on the website and "No active bookings" on the phone, in the same workspace at the same moment. This was a server-side fix, so there is nothing to install: every phone with Shelf Companion already picked it up, whatever version it is running.
Seeing more does not mean doing more. Reserve, check out, check in, cancel, archive, delete and every add or remove of gear keep the ownership rules they always had. And the custodian's name on those lists is governed by the separate Custody visibility toggle, so a workspace can open up bookings while still printing private where the holder's name would be. See Configure what Self-service and Base users can see.
See the month instead of the list. The Bookings screen has two lenses, and the list/calendar switch sits in the header. The calendar draws one coloured band per booking across the days it runs, so a five-day job reads as a single run rather than five separate dots, and a week that is fully committed looks different from one that is not. A day that holds more bookings than the cell can draw shows the most urgent ones first — overdue before ongoing, ongoing before reserved — and a +N for the rest.
Tap a day and the panel underneath lists what is booked on it, each row with its status and a tap through to the booking. An empty day says "Nothing booked on this day." On a team workspace the panel also carries a New booking button that starts a booking on the day you tapped. Pull down to refresh, so a booking someone else just made on the web appears without leaving the screen.
The search box and the status pills apply to both lenses; sorting is a list-only control. Because the grid shows one month while the list is date-blind, a row under the calendar says "N more outside this month" and jumps you to the next booking's date rather than letting those bookings quietly disappear.
Create or edit a booking. Tap New booking to set the name, dates, and custodian right on the phone, then add the gear and reserve it. Reserving follows exactly the same rules as the web: the booking has to hold at least one asset or one model reservation, and nothing on it can be marked unavailable or already booked for those dates. Those checks run on the server, so the app can no longer reserve something the website turns away, including an empty booking. See Troubleshooting: Booking Conflicts for the three reasons and how to clear each one. You can also open an existing booking to edit its details or reschedule it. Availability-aware pickers only offer assets and kits that are free for the window you chose, so you don't reserve gear that's already committed elsewhere. The asset, kit, model, location, and team-member pickers all page through your full inventory as you scroll, so nothing is stranded past the first page.
Who the custodian picker offers you. The Custodian field on New booking and on a booking you edit holds the people your role may put on a booking, which is the same set the web form gives you. Administrators and Owners get the whole team, and can search it. Base and Self-service members get one name — their own — because a booking they make is a booking for themselves. The workspace's custody visibility setting does not change this: it governs whose custody you can see, never whom you may assign. See Configure what Self-service and Base users can see.
Build out a booking by scanning. Open a draft booking and tap Scan to Add Assets, then scan the assets and kits you're packing. A kit brings in its members, and only the ones the booking does not already hold.
Kits stay together on the booking. A booking that holds a kit shows the kit as one row, the same way the web booking page does. The row shows the kit's name and image, how many of its assets are on the booking, its category and location, and its status. Kit rows start closed: tap one to see the assets inside, and tap again to close it.
A kit is picked as one thing. When you Select to Check Out, Select to Check In or Select to Remove, the kit row gets a single tick box. Tap the row once and it picks every asset in the kit that can take that action (in check-in, only the ones still out). Tap it again to drop the kit. The assets inside a kit have no tick box of their own, and tapping one while you are selecting does nothing, so part of a kit can't go out, come back or leave the booking by accident. The web booking page works the same way. Starting a selection leaves your kits open or closed as they were, and the arrow at the end of a kit row still opens it, so you can look inside before you pick it. Assets that are not in a kit keep their own tick box.
A kit the mode cannot act on shows no tick box at all, the same way an asset in that state does. A kit that is already checked out has none while you Select to Check Out, and a kit that is not out yet has none while you Select to Check In. The row keeps its place in the list, so pictures, names, badges and arrows still line up down the column, and tapping the row or its arrow opens the kit as usual. Select to Remove keeps every tick box, because any kit on the booking can be taken off it. When you tick a kit, the frame drawn around its members is now closed on all four sides rather than open on the left.
The button at the bottom counts a kit as one item and says what it will act on, for example Check Out 1 Kit & 1 Asset, Check In 3 Assets or Remove 2 Kits. The question it asks and the message you get back count the same way: "Check out 1 kit and 1 asset?", then "1 kit and 1 asset checked out. The rest is still reserved." They used to count the kit's members instead, so a three-asset kit plus one asset read "Check out 4 selected assets?" under a button that said 1 Kit & 1 Asset. This holds on the booking screen and in the scanner's check-out and check-in drawers. Check Out All Assets still names the booking's raw asset total, because it acts on the whole booking rather than on a selection. On the phone, an asset in a kit leaves a booking only together with its kit; to take off a single asset from a kit, use the web booking page. Removing a kit is sent as a kit removal when the booking holds every asset in it. If the booking holds only some of them, picking the kit removes the assets it does hold.
A kit added from the phone also keeps its grouping on the web booking page. Before, a kit added in the app arrived as loose assets, and neither the phone nor the web could show it as a kit again.
Reserve by model, then scan the actual units. If your workspace groups identical gear under Asset Models, the booking's Models tab reserves a count rather than specific units: reserve "4x HDMI cable" now, adjust the quantity later, or remove the reservation. The booking detail shows what is still outstanding. You can still change the count after the booking has gone out. Since the update of 2 October 2026 the quantity sheet will not go below the units already assigned to the reservation. Once units are assigned, the field shows the allowed range, for example 2–6. Set it to exactly the assigned count to release every unit that is still unassigned. A reservation can only be removed while nothing is assigned to it, so the app offers no remove control once a unit is on the booking. When it is time to hand the gear over, tap Scan to assign & check out and the fulfil scanner opens with the reserved models listed and a live "2/4 assigned" counter. Scan the physical units, submit, and Shelf assigns those exact units to the reservations and checks the booking out in one step. If you scan units the booking had not reserved, the submit button names both jobs separately, for example "Assign 4 · add 2 · check out", so you can see what is being added on top of the reservation before you commit. The CTA is there for admins and owners, who are the roles allowed to fulfil a reserved booking. See Book by Model for how the same flow works on the web.
Scan a kit into the fulfil scanner. Scanning a kit's code on Scan to assign & check out used to come back with "Kits can't be checked out from the reservation scanner". It works now: the kit goes on the booking whole, its individually tracked members assign outstanding reserved units of their model on the way, and the whole case goes out with the submit. A unit that belongs to a kit still cannot go out alone here — scan one without its kit and the answer is "…" belongs to a kit, so it can't go out on its own. Scan the kit to take all of it, or scan another unit of the same model. This was a server-side change, so there is nothing to install: every phone with Shelf Companion behaves this way, whatever version it is running. See A unit inside a kit counts too.
Reserved units that have no physical unit behind them yet are counted on the bookings list too. A row reads "0 assets · 5 reserved" rather than a bare "0 assets", so a booking built entirely from model reservations never looks empty. Those units are genuinely held and unavailable to anyone else.
Who made it, and what it is tagged with. The booking detail names the person who created the booking on a Created by row, and shows the booking's tags as chips in their workspace colours. The custodian and the creator are often different people, so both are worth reading before you act on someone else's booking.
Manage the booking's lifecycle. Reserve, cancel, archive, delete, or duplicate a booking without leaving the app.
Find one item on a big booking. Each asset on a booking shows where it is kept, on a location line under its name, the same way the web booking page does. Kit members show their own location too. Above the list, the Search assets & kits box narrows what you see as you type. It matches an asset's name, category and location, and the name, category and location of its kit. When one asset in a kit matches, the whole kit comes back, so you never see part of a kit. If nothing matches, the list says No assets match. Searching only changes what is on screen: anything you already selected stays selected, and the button still counts all of it. The phone's search does not look at SAM IDs, tags, QR codes or barcode values, and it treats commas as part of the text. Use the scanner to find an item by its label.
What is still to go out sits at the top. A booking's item list is ordered the way the web booking page orders it by default: everything still waiting to be checked out comes first, and everything already out sinks to the bottom. A kit moves as one block with its members kept together, and it only sinks once every member of it is out. A quantity-tracked line stays at the top while any of its booked units are still waiting, and comes back to the top if units are returned. Items that tie break A→Z by name. That matters most halfway through a hand-over, when the two or three things still to collect stay where you are looking instead of being pushed under everything you have already loaded. The phone used to do the opposite and list the checked-out items first. This was a server-side change, so there is nothing to install — every phone with Shelf Companion already lists a booking this way, whatever version it is running.
Check out one item at a time or in bulk. You don't have to check out a whole booking at once (progressive check-out). A reserved booking offers three ways to hand gear over:
- Check Out All Assets checks out everything in one go. It is offered while the booking is Reserved.
- Scan to Check Out opens the scanner for this booking. Scan each asset or kit as you hand it over. The scanner only takes assets that are on this booking and still waiting to go out. Anything else is refused with the reason, for example Not in This Booking, Already Checked Out or In Custody. A kit's code adds its assets that can go out, and scanning the same kit again tells you Already Covered. Tap the button at the bottom, for example Check Out 2 Assets, to send the list. The scanner stays open while the booking still has gear to hand over, and takes you back to the booking once everything is out.
- Select to Check Out lets you tick the assets and kits you are handing over, then check them out together.
The first check-out moves the booking to Ongoing. After that, Check Out All Assets is gone, but Scan to Check Out and Select to Check Out stay on the booking until everything has gone out, so you can hand over the rest later. A lifecycle progress bar tracks each item through Reserved, Checked out, and Returned, so a half-packed booking reads accurately.
Scanning a quantity-tracked asset checks out every unit of it that is still waiting on the booking. To take fewer units, use Select to Check Out, which asks how many. A pool kept at several locations leaves from the location with the most units left; the phone does not ask which, and the web booking row shows the location it recorded. See Where the units leave from.
A reserved model you could not find does not hold the booking back. A check-out needs one item to go out and nothing more. Check Out All, Select to Check Out and both scanners confirm the units still unassigned instead of refusing — the app names them the same way the web does, for example "2 × Dell Latitude and 1 × HP LaserJet are not assigned yet. They stay on the booking so you can scan them later or release them." Confirm and the booking goes Ongoing with what is ready; the reservations stay open, to be settled later with Scan to assign & check out, or released by lowering the count on the Models tab or from the web. A booking made only of reservations still cannot go out, because nothing would leave. See Checking out while units are still unassigned.
Scan to Check Out and Select to Check Out follow the same rules as the server. Administrators and Owners see them on any booking. Self-service members see them only on bookings they created or are the custodian of. Base members can't check gear out, so they see neither.
Check items back in. Use the in-app scanner to check items in as they return. Scan-to-check-in only accepts assets that are actually in this booking, expands kit codes to their in-booking members, and won't double-return an item that is already back.
Only what went out can come back. Since the update of 2 October 2026 the app offers check-in only for units this booking actually sent out and has not had back. A kit whose units never left has no tick box under Select to Check In, and its members read Reserved. The check-in sheet for a quantity-tracked line proposes only the units still out, so a kit with 2 of its 4 booked units out offers 2, not 4. A booking whose items have not gone out at all offers no check-in action. Before this update the app offered those rows, and confirming came back with the refusal "Cannot check in assets that were never checked out".
Record what came back for quantity-tracked stock. When a booking includes quantity-tracked assets, checking them in asks how many units came back in what condition. Returnable stock splits across Returned, Lost, and Damaged; consumables split across Consumed, Lost, and Damaged. The sheet defaults every remaining unit to the normal outcome, so the everyday "it all came back" case is a single confirm, and a colour-coded bar shows the split before you submit. You can also check out part of a quantity-tracked line and leave the rest booked. Returned units go back to the pool, while units marked consumed, lost, or damaged are logged against the booking and come out of stock.
A sheet you typed into stays open if the save fails. The sheets that take numbers — adjust quantity, the check-in disposition split, and Manage Placements — used to close the moment you tapped save, so a save the server refused took your numbers with it and you started again from memory. They now stay open with the error and everything you entered still in place, ready to correct and send again.
Times you pick are your account's times. When you set a booking's start and end on the phone, the date and time pickers work in the time zone from your Shelf date and time preferences, not the zone your handset happens to be in. Pick 9:00 and the booking reads 9:00 afterwards, wherever you are standing. Before this, anyone whose phone zone differed from their Shelf preference picked one time and saw another the moment they saved. On iPhone the inline date picker also follows the app's own Settings ▸ Appearance rather than the phone's, so running the app in light mode on a dark phone (or the other way round) no longer draws the calendar dark-on-dark or white-on-white. Android was already readable and is unchanged.
Roles apply: self-service members act on their own bookings; admins and owners act on behalf of others. The app enforces the same permission, ownership, and status rules as the web, so you can never do more from the phone than your role allows.
10. Custody Handoffs
For day-to-day custody handovers outside a formal booking flow:
- Open the asset (scan or search), tap Assign custody, pick the teammate.
- When the equipment comes back, open the asset again and Release custody.
An asset a kit is holding is released through the kit. The app draws Release custody on any asset, including one that is only in custody because its kit is. Tapping it on such an asset now comes back with "This asset is in custody because its kit is. Release the kit's custody instead." Open the kit and release it there, or take the asset out of the kit, and the hold clears. Until then, the button is there and the answer is the refusal. See Custody a kit put there belongs to the kit.
The full custody chain is logged with timestamps. The web app's audit log shows every step.
Quantity-tracked assets. For assets tracked by quantity (cables, gloves, other pooled supplies), custody is by portion rather than all-or-nothing. The asset detail screen shows the total plus a per-status breakdown — available, in custody, reserved, and checked out — and a row for each holder. Tap Assign to give a set number of units to a teammate (capped at what's available to assign), or tap a holder's row to release units back to the pool. Individually tracked assets keep the same one-tap assign and release. The sheet does not ask which location the units come from: on a pool kept at two or more locations the web dialog does, and units assigned from the phone read location not recorded there. See Which location the units come from.
Ending a hold on a consumable. If the asset is a one-way consumable (gaffer tape, batteries, anything that gets used up rather than returned), releasing a hold asks a second question: "Of those, how many were used up?". It pre-fills the full amount, because using the whole hold is the usual case. Whatever you mark as used up leaves the workspace total; the rest goes back to the pool. Assets that come back intact never see this question.
Correcting stock from the floor. The quantity card on the asset detail screen has an Adjust button. Tap it, choose whether you are adding or removing units, enter the amount, and add a short reason. Adding is recorded as a restock and removing as a loss, so a stock count you correct on the shelf lands in the asset's history with your note attached rather than as an unexplained change. The sheet tells you how many units are actually removable as you type.
Low stock at a glance. When the available units drop to or below the minimum you set for the asset, the Available figure on the detail screen turns amber. It uses the same rule as the web, so an asset flagged low on your phone is flagged low on the web too.
Workspace Add-Ons — What the App Shows
The app respects whether your workspace has an add-on enabled:
- Audits add-on enabled — Audits tab is active. You can run and complete audits.
- Audits add-on not enabled — Audits tab shows an informational "Contact your admin" message. No upgrade link or paywall — those live on the web side, where billing happens.
- Barcodes add-on — The app's scanners read every code type Shelf registers: QR, Code 128, Code 39, DataMatrix and EAN-13, on both the general scanner and the audit scanner. Scanning any registered code lands on its asset. Since the update of 21 September 2026 an asset's and a kit's detail screens also list the codes it carries, in a Codes card that leads with the one your workspace prefers and lets you switch between the rest. Adding and editing codes is still a web job. See Alternative barcodes.
What the App Does Not Do Yet
For clarity, these are real, intentional gaps. They are on our radar, but they are not in the app today:
- Claiming a brand new QR code as a base or self-service member. Admins and owners can now claim an unclaimed sticker in the app (see step 4). Claiming is an administrator's job on every platform, so this is a role limit rather than a mobile one.
- Workspace administration. User and role management, bulk imports, custom field setup, reporting, and billing stay on the web.
- Adding or editing an asset's codes. The detail screen lists the codes an asset carries, but registering a new barcode or changing one is a web job.
This guide describes version 1.5.0, live on the App Store and Google Play since 31 August 2026. Grouping a booking's kits and the Manage Placements editor reached 1.5.0 through an over-the-air update on 10 September 2026, so the version number did not change. Scan to Check Out, picking a kit as one thing, and the booking's location lines and search followed the same way on 14 September 2026. A further update on 21 September 2026 brought the Codes card on asset and kit screens, the custody-through-a-booking rows, the paused camera resuming on any tap, manual code entry above the keyboard, kits counted as one thing in the check-out and check-in questions, sheets that stay open when a save fails, and the tick box hidden on a kit the mode cannot pick. The update of 2 October 2026 brought unit counts to the custody scan, check-in limited to what actually went out, the reservation count's lower limit, and the device and app version on each scan. The app downloads an update like this in the background when you open it and uses it from the next time you open it. If your app is older, take the update from the App Store or Google Play. Two items that used to sit on the list above shipped in 1.3.0 and moved into the guide: recording where a scan happened (step 4) and claiming a brand new QR code (step 4, for admins and owners). The booking calendar, the audit evidence action, and the model and asset ID rows need 1.4.0. Connecting to your own server, undoing an audit scan, and the scanner's clearer results need 1.5.0.
Anything Shelf changes on the server side reaches every installed version at once, whatever it says in Settings. The booking-visibility rule described in step 9 is one of those.
Opening Shelf Links in the App
If you have Shelf Companion installed, tapping a Shelf link on your phone — an asset, booking, audit, or QR code URL at app.shelf.nu — opens it directly in the app instead of bouncing through the browser. This works on both iPhone (Universal Links) and Android (App Links). Sign-in and account pages still open in your browser, so links that need a full web session behave exactly as before.
Where to Go Next
- Shelf Companion overview — product page with screenshots, features, and the App Store and Google Play links.
- Getting started with Shelf — if you are still setting up your workspace, start here first.
- Printing QR labels — you'll want labels on your assets before scanning at scale.
- Bookings overview, Kits overview, and Audits overview — read up on the workflows you'll be running from the floor.
Questions or Issues?
If something is not behaving the way this guide describes, contact us — we want to know. The app is new and we are watching it closely.
Ready to try Shelf?
Put what you're learning into practice. Free plan available — no credit card required.